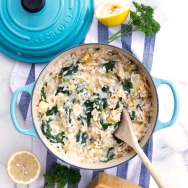
Instant Pot Shrimp Risotto
- Gluten-Free
- Dairy-Free
- Pescatarian
Instant Pot risotto?? Oh yes, she did. So I LOVE regular risotto and I love making it, but sometimes all of the stirring gets old. I mean, you have to stir for like 30 minutes straight. To be honest, the effort is so worth it, but I knew there had to be a good short cut using the Instant Pot. And I was right!
This risotto is so much easier to make and tastes exactly the same. Not joking. I was so skeptical that it wouldn’t be as good. But I was so wrong!
Oh yeah, for those wanting to make risotto the traditional way, make sure to check out my Crawfish Risotto recipe! If you don’t like crawfish (who are you even??) or you can’t find them, you can replace them with shrimp, bay scallops, or even lobster! 😍
For this recipe I use my 6-qt Instant Pot and you can make the entire recipe in it! Even searing the shrimp! Now, I do prefer to make the shrimp in a skillet while the risotto is cooking. It saves time and allows you to control the temperature better. BUT you can totally do it all right in the Instant Pot if you want! I have instructions for both ways in the recipe.
For the skillet method I like to use my trusty 15-inch Lodge Cast Iron skillet. THE BEST, y’all. It is huge and you can cook the entire pound of shrimp in one batch! Let’s be honest, batch cooking is a pain. I say just get a bigger pan.
If you’re like me, you’ll find tons of good use for a pan this big. I love to use it to cook chicken thighs, steaks, shrimp (duh), all sorts of veggies, and I use it all the time to make my Easy Shrimp Cashew Stir-Fry! That’s right, I make stir-fry in my big cast iron skillet instead of a wok. I know, what a rebel, right?
Sooooo you’re probably wondering, is this recipe even healthy? Okay, okay, not really. But for a splurge meal, it is perfect. It’s not really unhealthy, per se. It is made with real food ingredients and can easily be made dairy free with the easy substitutions listed in the recipe below. But no, it is not low calorie, and no, it can’t be made low carb. Sorry! Maybe some day I will attempt a risotto using a low carb alternative, but for now I can’t recommend a good substitution.
Okay, let’s get cooking! I hope you enjoy this recipe as much as I do!
Join My Community!
Want to get my new recipes delivered straight to your inbox?
Sign up for my weekly newsletter and never miss a new recipe!

Instant Pot Shrimp Risotto
- Gluten-Free
- Dairy-Free
- Pescatarian
Ingredients
- 1 lb shrimp peeled and dried off with paper towels
- Sea salt black pepper, and paprika to season shrimp
- 3 Tbsp grass-fed butter or ghee plus extra if needed for cooking shrimp in batches
- 1 Tbsp extra virgin olive oil
- 1 medium yellow onion diced
- 1 large shallot diced
- 2 stalks celery diced
- 2 large cloves garlic minced or pressed
- 1 1/4 cup 250g Arborio rice (dry, do not rinse)
- 1/2 cup dry white wine
- 2 cups salt-free organic chicken stock
- 1 tsp sea salt
- 3 oz 85g good quality parmesan cheese, finely grated (substitute with Treeline Classic Aged Nut Cheese for dairy-free)
- 1/2 tsp freshly squeezed lemon juice
- Parsley and black pepper for garnish
Instructions
- Season shrimp by lightly sprinkling with a bit of salt, pepper, and paprika.
- Cook Shrimp now if using option 1. *See options in notes below* To cook shrimp in the Instant Pot, press the sautè button and wait until it says "HOT" on the screen. Add 1 Tbsp butter, allow to melt, then cook shrimp for 1 minute per side or until opaque through, working in batches without crowding. Add more butter as needed between batches. Remove shrimp to a plate lined with paper towels to drain.
- Sauté vegetables. If you cooked the shrimp in the Instant Pot, just leave the sauté function on and add 1 Tbsp butter and 1 Tbsp olive oil to the pot. If you are cooking the shrimp in a skillet during step 8, turn the sauté function on now and allow the Instant Pot to heat up. When the display reads "HOT", add the 1 Tbsp butter and 1 Tbsp olive oil. Both methods proceed from here together: Allow the butter to melt, then add in onion, shallot, and celery and sauté for 3 minutes. Add garlic and sautè for 30 seconds.
- Toast the rice. Add rice to pot, stir to coat in oil, then cook for 2 minutes, stirring constantly to toast the rice.
- Add wine and cook for 2 minutes, stirring constantly and scraping the bottom well.
- Add stock and salt, stir well. Turn Instant Pot off.
- Cook risotto. Secure the lid, set valve to sealing position, and set to manual high pressure for 3 minutes. It should take about 5 minutes to come to pressure.
- Cook shrimp now if using the skillet method (*see notes below*). Melt 1 Tbsp butter over medium-high heat. When the pan is hot, add shrimp, one by one, and cook for 1 minute per side or until opaque through (this is for medium-large shrimp, adjust cook time based on the size of your shrimp). If you are using a smaller pan you will need to work in batches so as not to overcrowd the pan. Add more butter to the skillet as needed if working in batches. Remove shrimp to a paper towel-lined plate.
- Natural release 5 minutes. When the Instant Pot timer goes off, allow the pressure to naturally release for 5 minutes.
- Quick release. Do a quick release to depressurize the rest of the way.
- Season to taste. Remove the lid, taste, and season with more sea salt if desired.
- Add parmesan and butter. Stir in remaining 1 Tbsp butter, parmesan cheese, and lemon juice. The risotto should be smooth and creamy. If it looks too thick, just add a bit more stock until you get a smooth consistency.
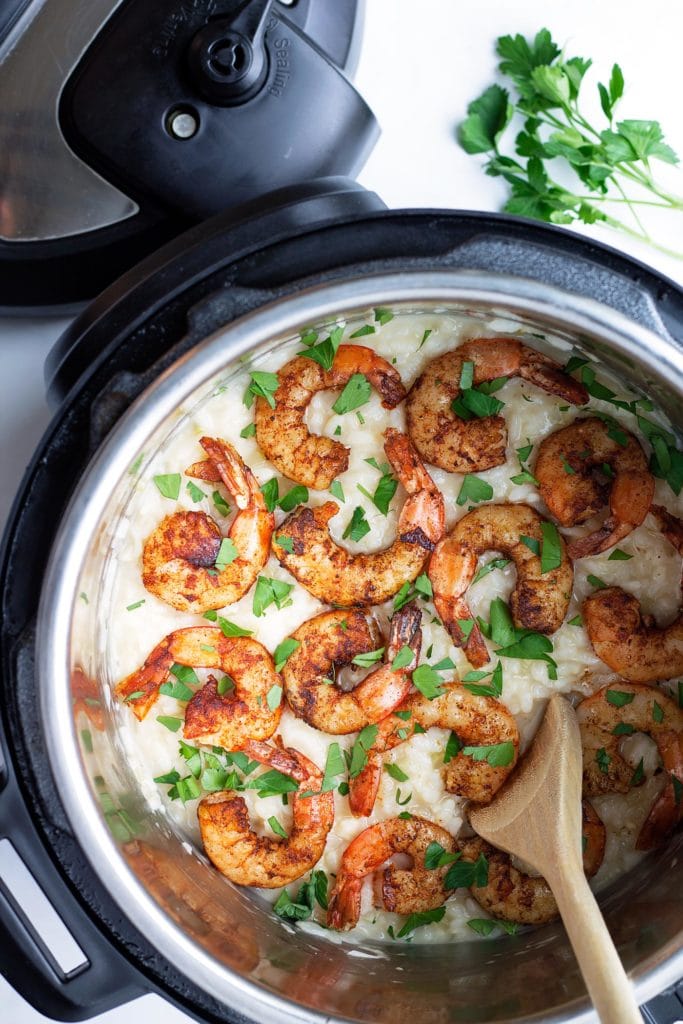
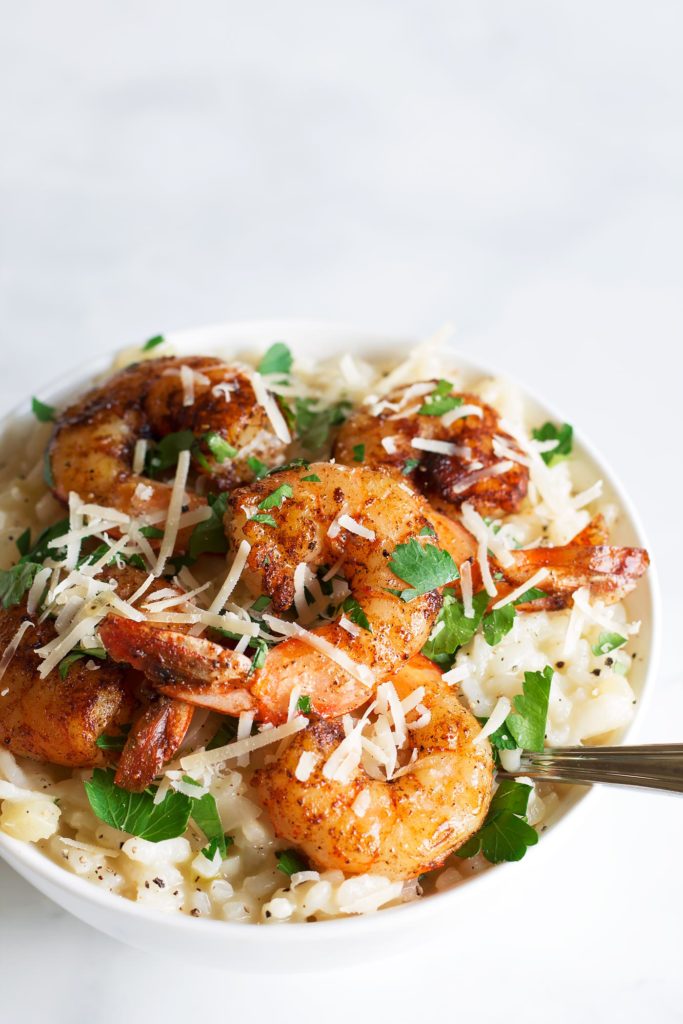
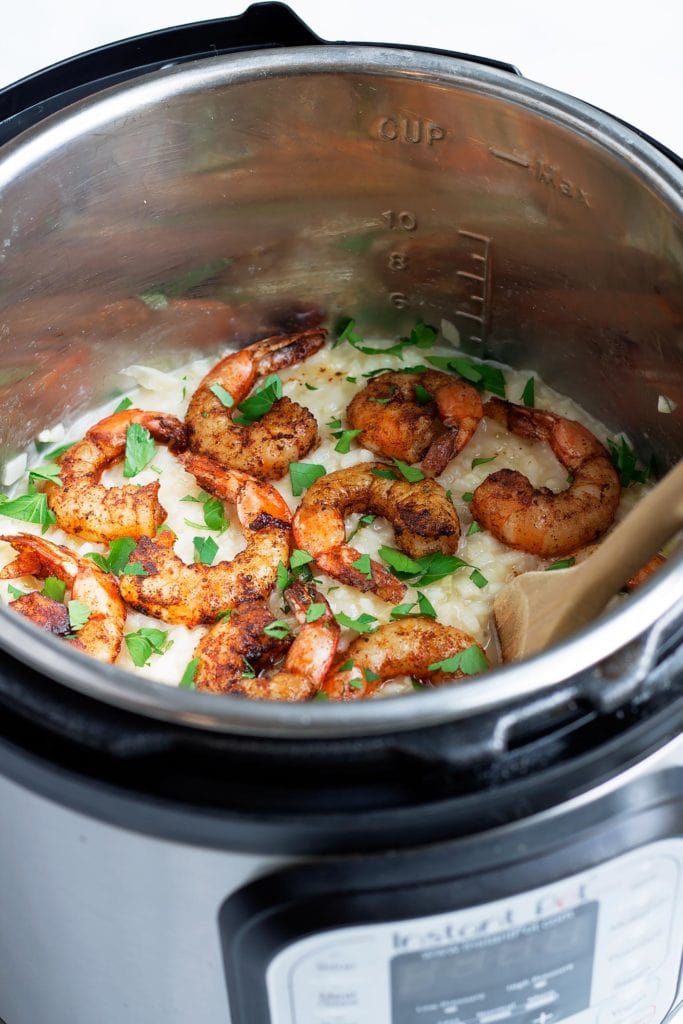
- Top with shrimp and garnish with parsley, black pepper, and more parmesan if desired.
- Serve immediately for best texture. If you let risotto sit, it will thicken as the rice absorbs more of the moisture and it won't have that nice creamy texture. If you must wait and the risotto thickens, just stir in a little more stock. The rice will swell a bit and won't have that nice al dente bite, but it will still taste great 😊.
Did you love the recipe? I would love it if you left me a 5-star review below! ![]()
Notes
Did you make this recipe?
Tag @itskitskitchen on Instagram and hashtag it #kitskitchen
How did yours turn out?? If you liked it make sure to let me know in the comments section and leave a review! xx Kit
Disclosure: This post contains affiliate links (Amazon Associate). These links do not cost you anything, but I do receive a commission when you use them. They are a great way to support blogs you love and pick up some good things while doing it!


Delicious! Made the shrimp in the Instant Pot and then followed the recipe. Leftovers were still terrific.
Yay!!! So glad you liked it! Still one of my favorites!
Hi Kit! Mmmm your Shrimp Risotto looks so delicious! I love that it is made in the Instant Pot too! Great work. 🙂
Hi, Alia! Thanks so much! 😊