Maple Vanilla Bean Meringue Cookies
- Gluten-Free
- Dairy-Free
- Paleo
- Low Calorie
- Vegetarian or Vegan
- Pescatarian
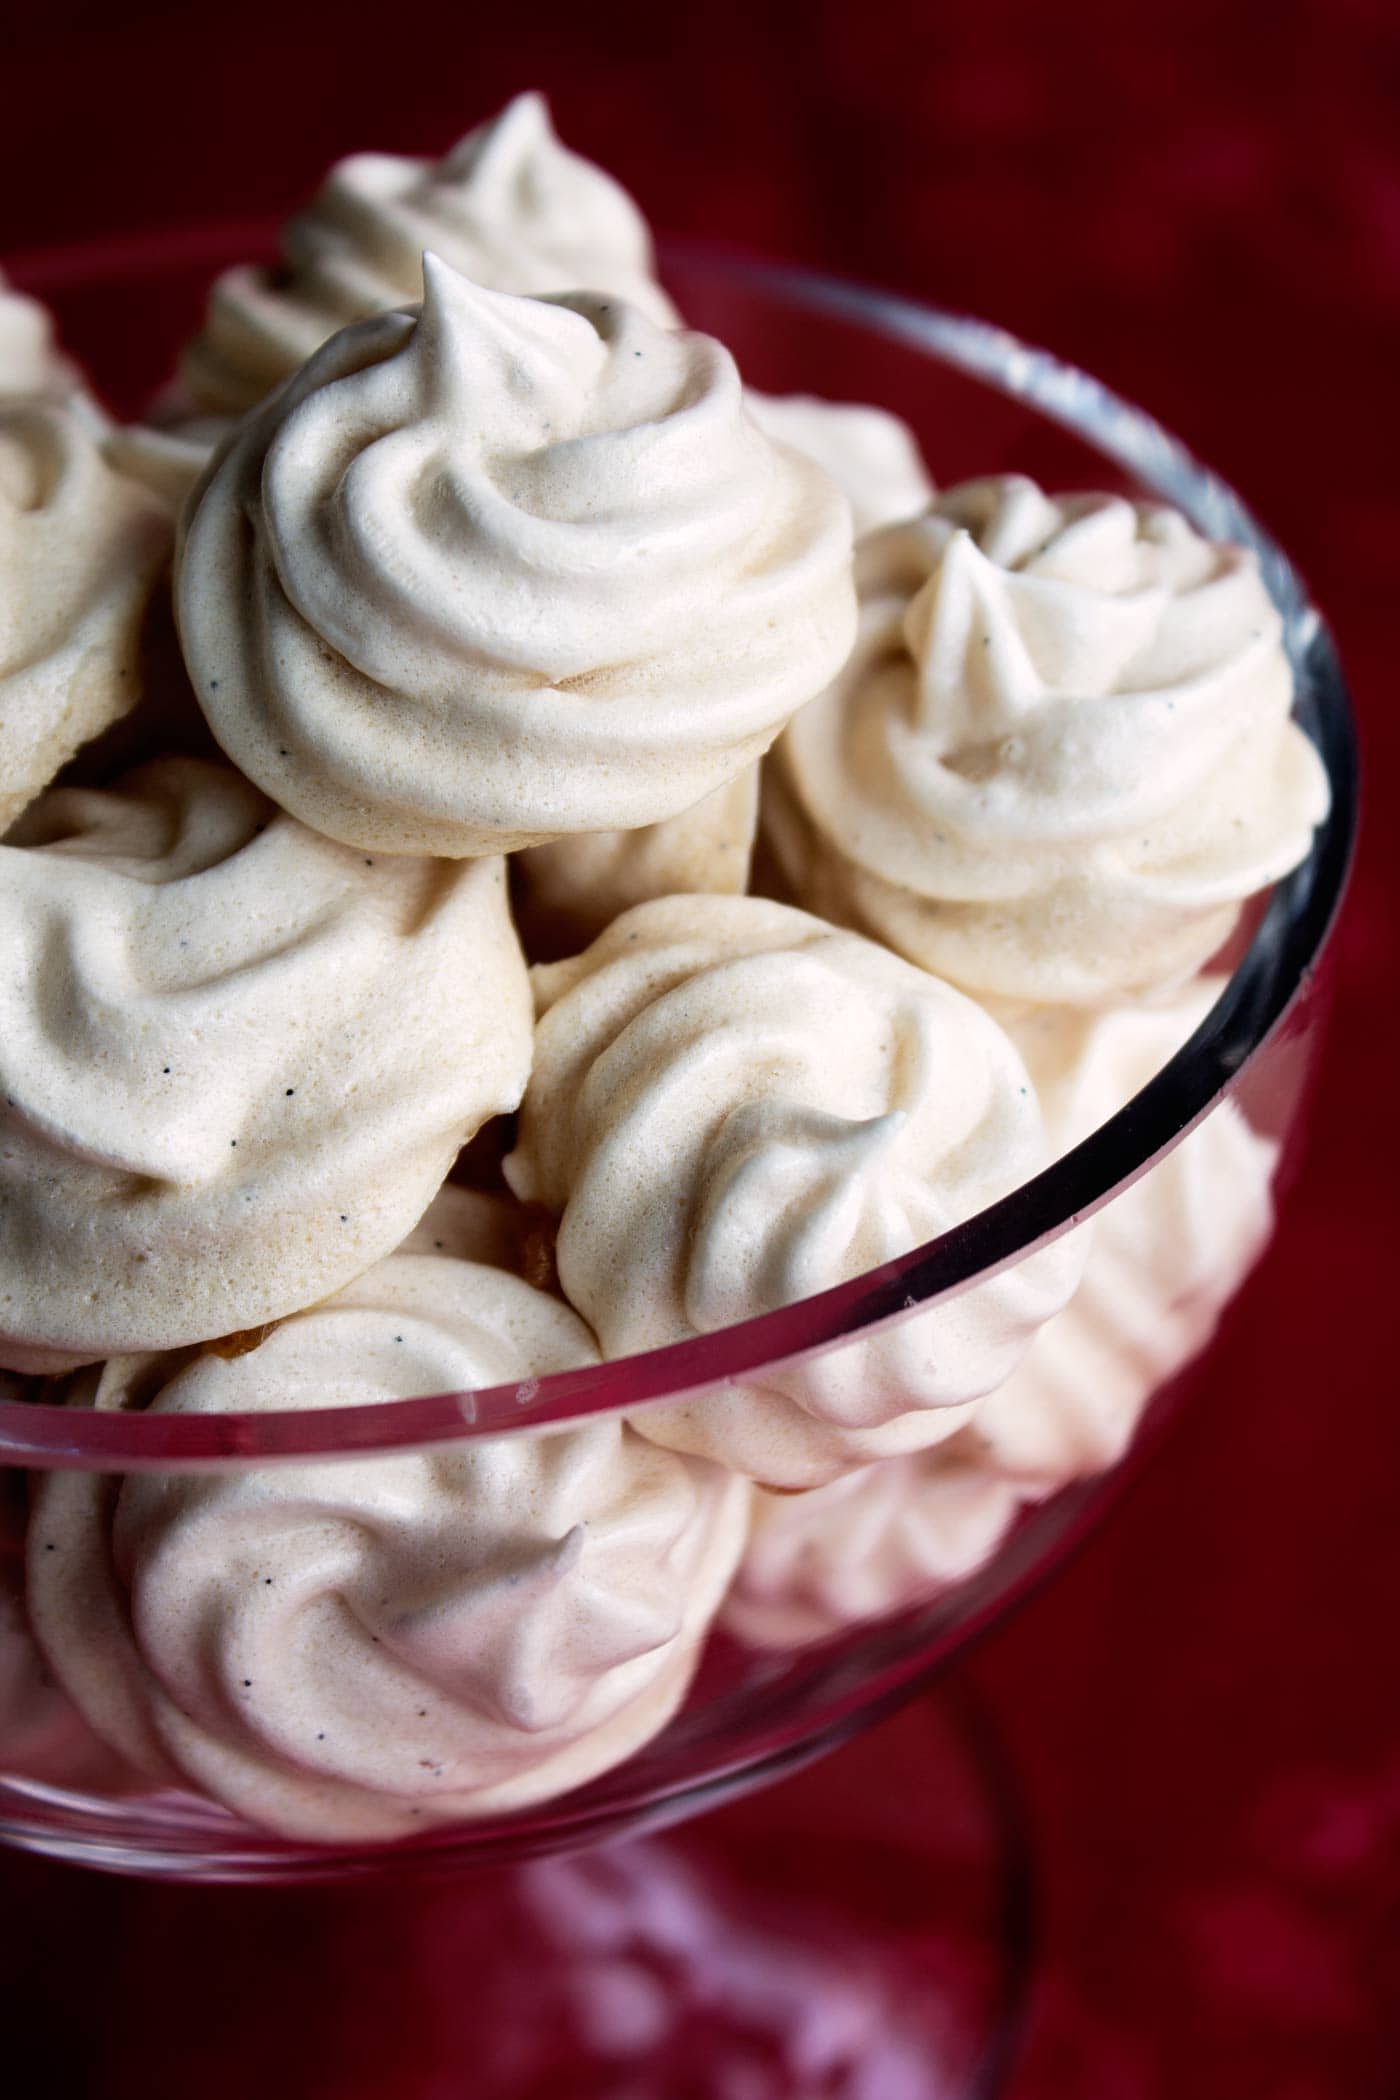
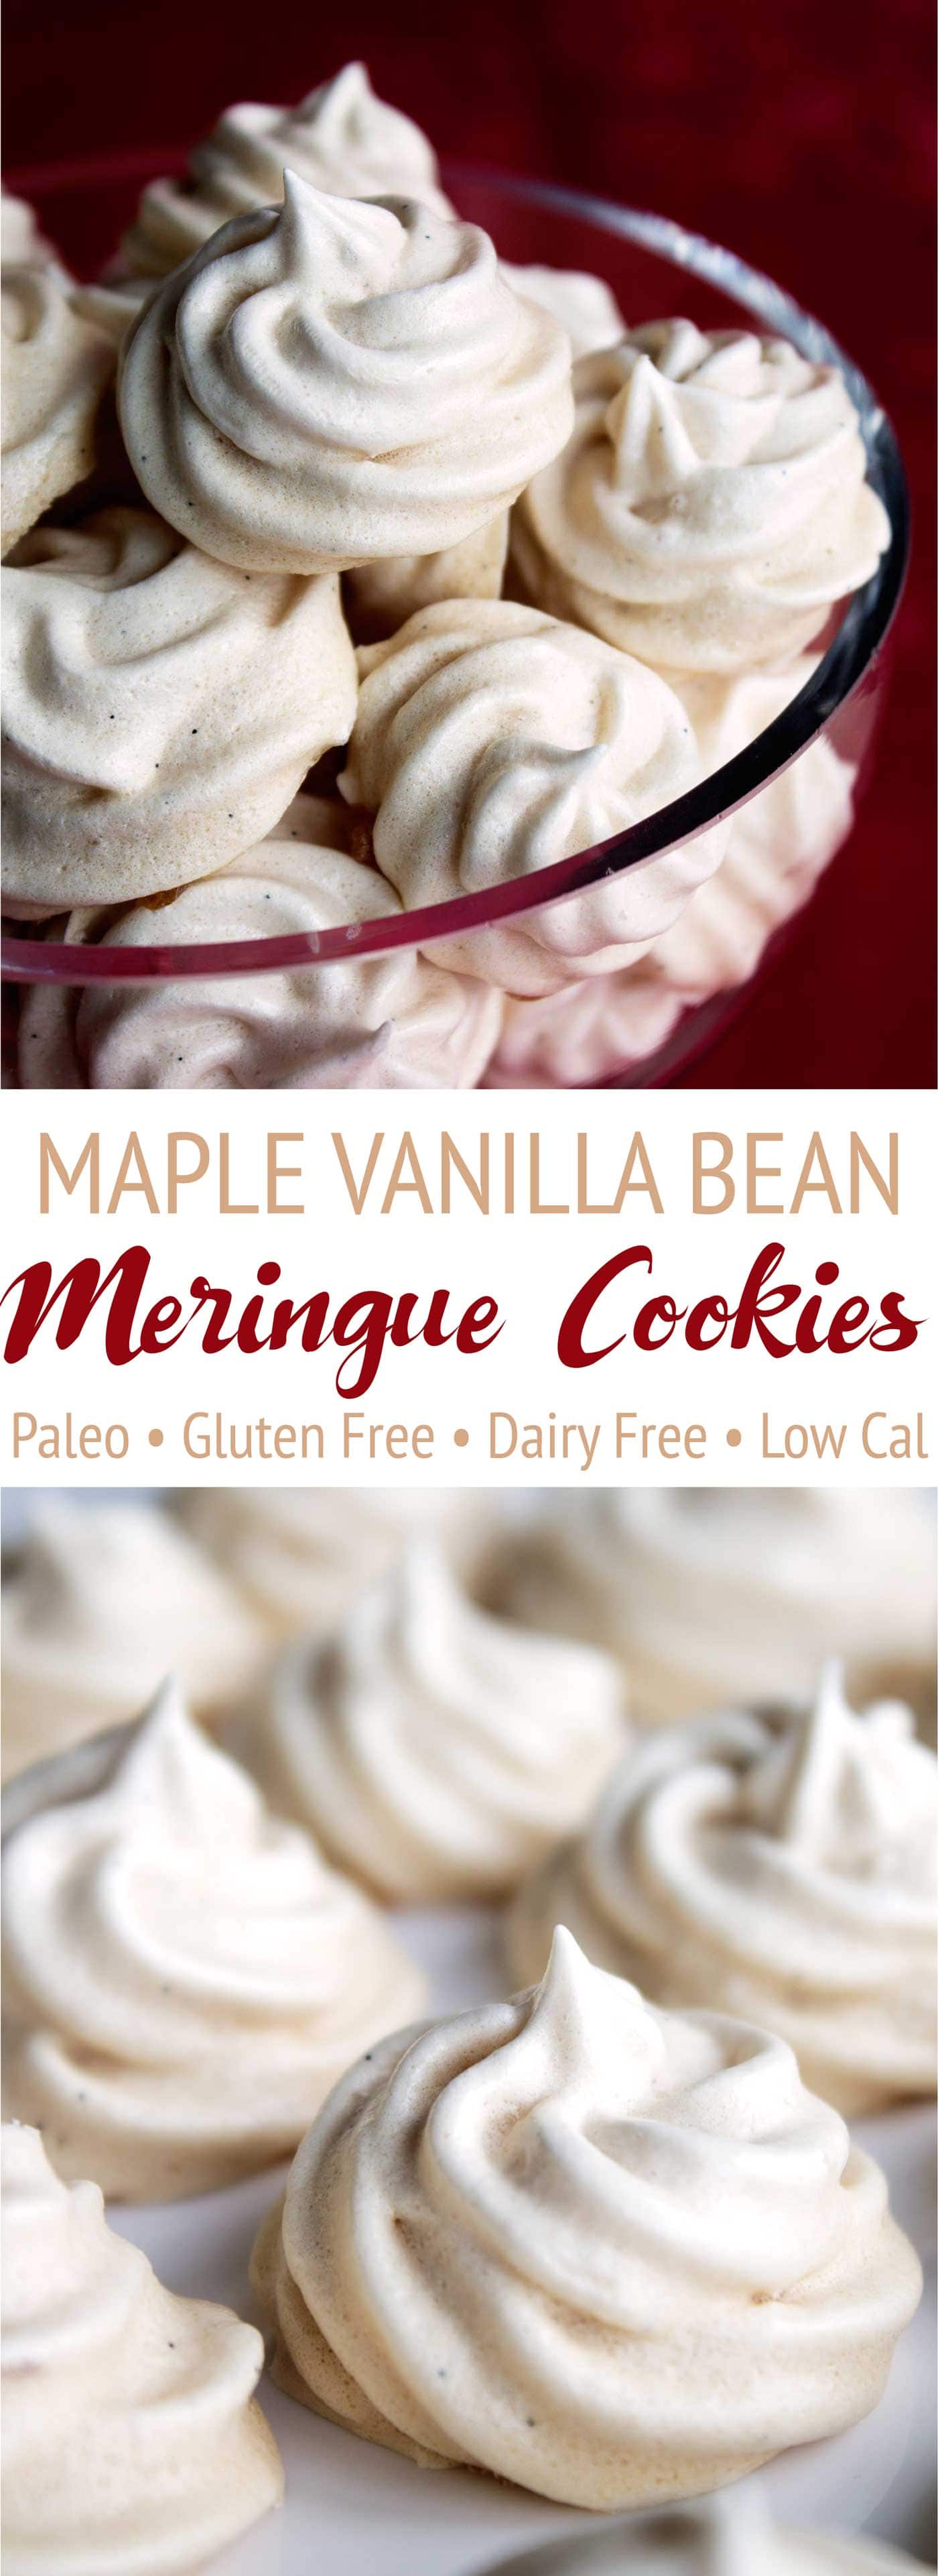
It’s finally Christmas season and you know what that means! It’s time for Christmas cookies! These maple vanilla bean meringue cookies are the perfect addition to your Christmas cookie repertoire. These delicious cookies are also paleo because I use maple syrup as the sweetener instead of refined cane sugar. That doesn’t mean you sacrifice on taste though. No, no, no. These meringue cookies actually have more flavor than normal meringues because of the maple syrup. Add in freshly scraped vanilla beans and you’ve got little fluffy clouds of taste explosion that literally melt in your mouth. OMG, y’all.
I’ve been making meringue cookies with my mom at Christmas since before I can remember, so they are so special to me. We used to call them night night cookies because we would make them after dinner, then leave them to dry in the oven overnight and check on them in the morning! I have so many great memories of making these cookies. 😊🎄
Now, fast forward quite a few years and let’s make those meringues paleo. Truth: my first attempt at paleo meringue cookies went all sorts of wrong. I decided to use the French meringue method in which you beat the egg whites first and then slowly add the sugar (or in this case maple syrup) and whip til you get a nice fluffy meringue. Well, it fluffed up and everything looked fine until they went into the oven and ended up weeping everywhere. Flat, sad meringue cookies in puddles of gooey maple syrup. Fail.
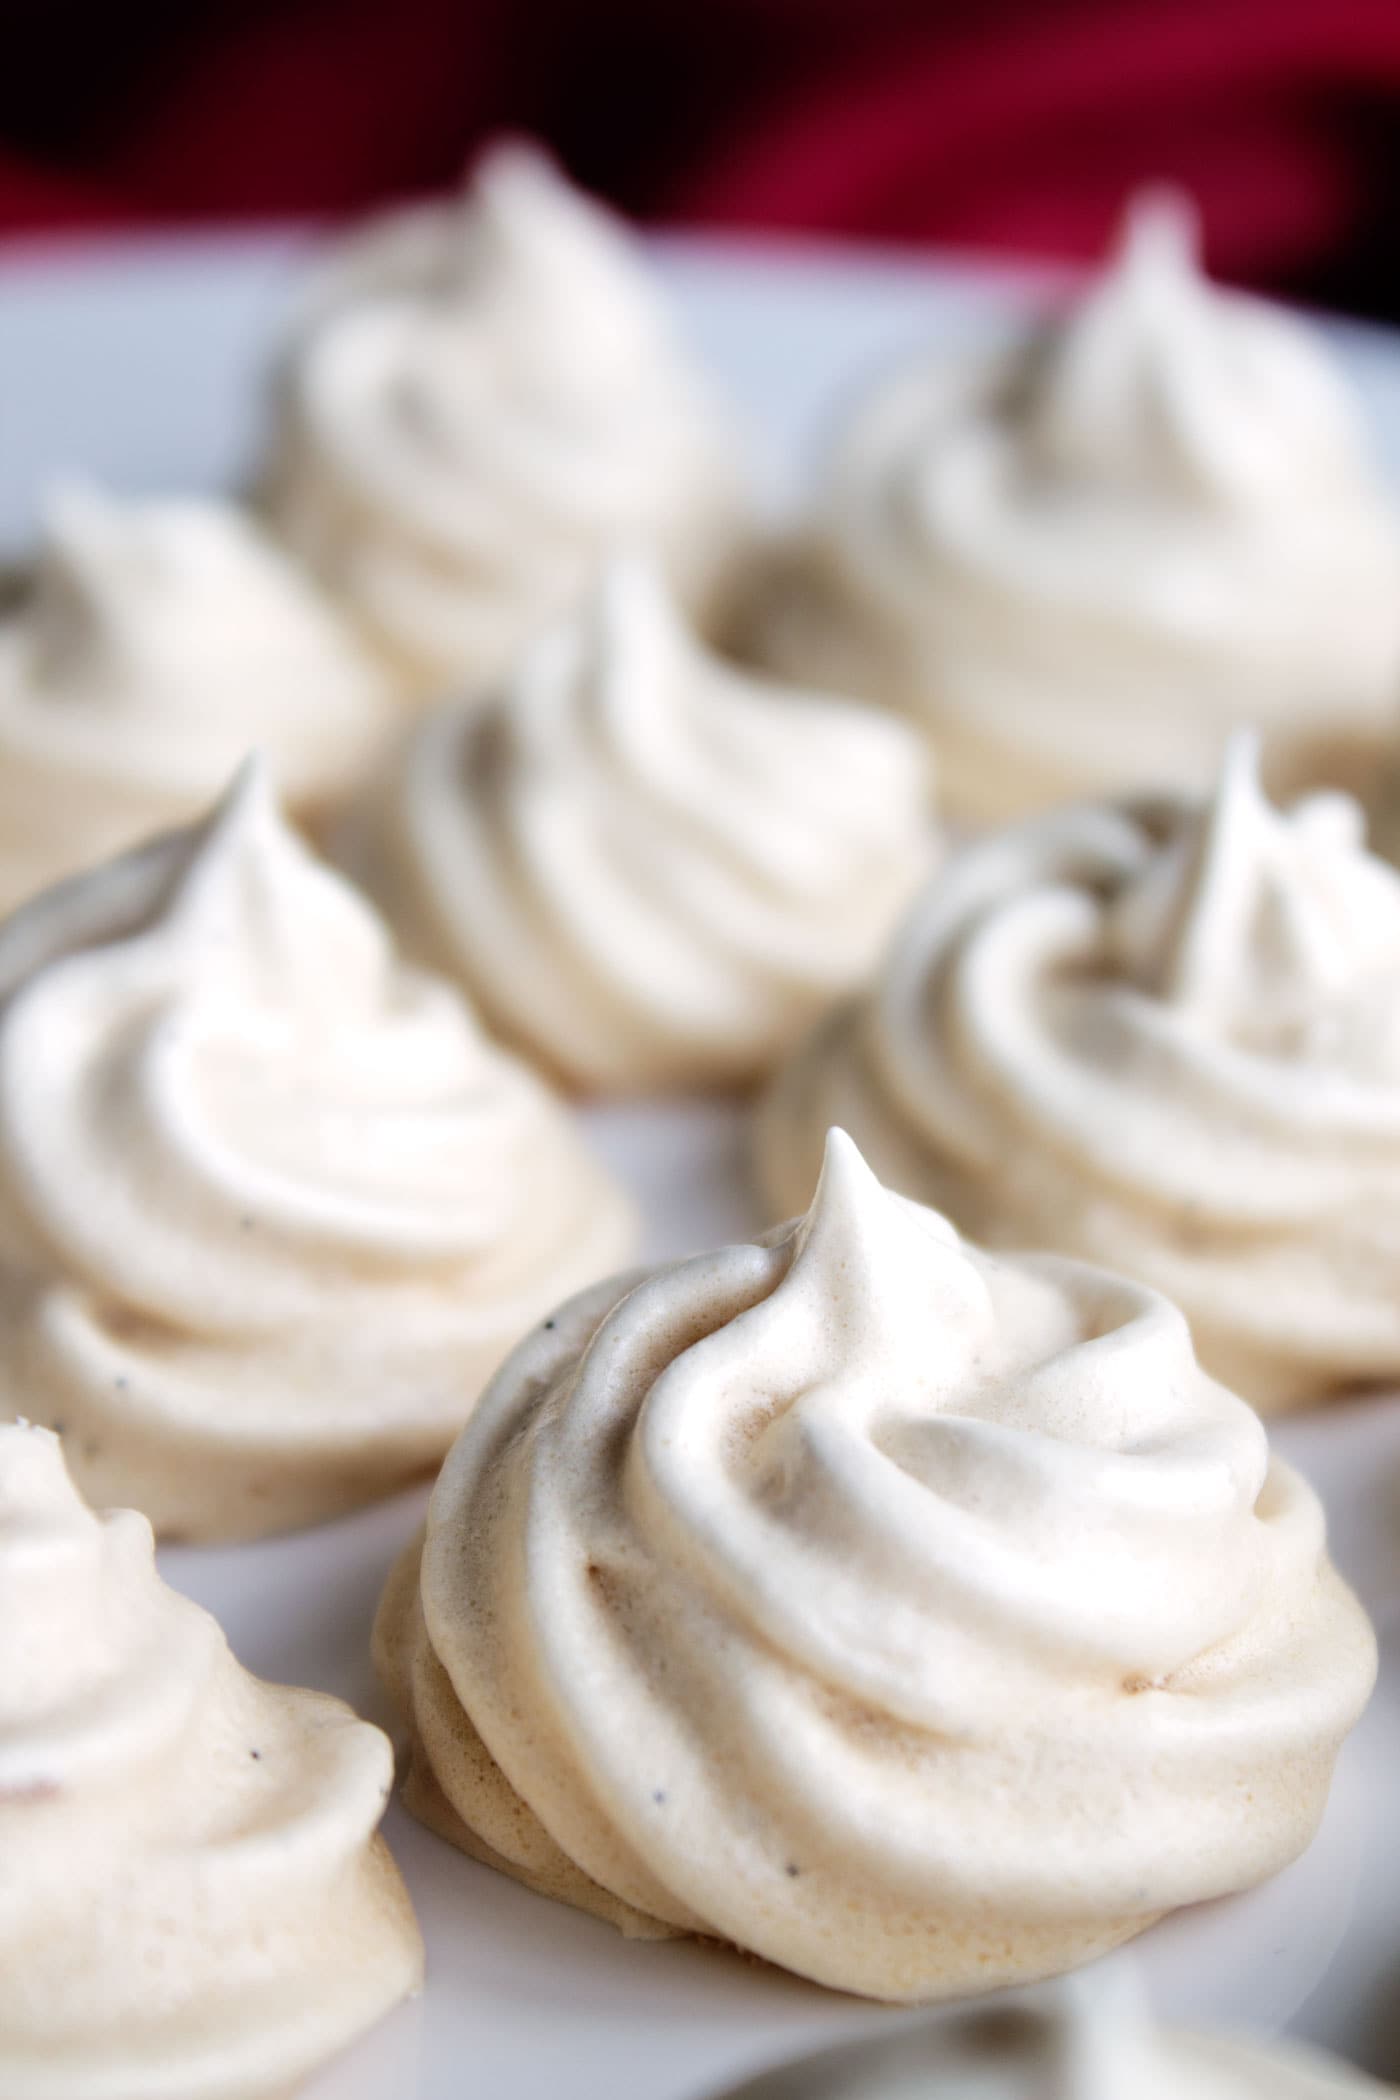
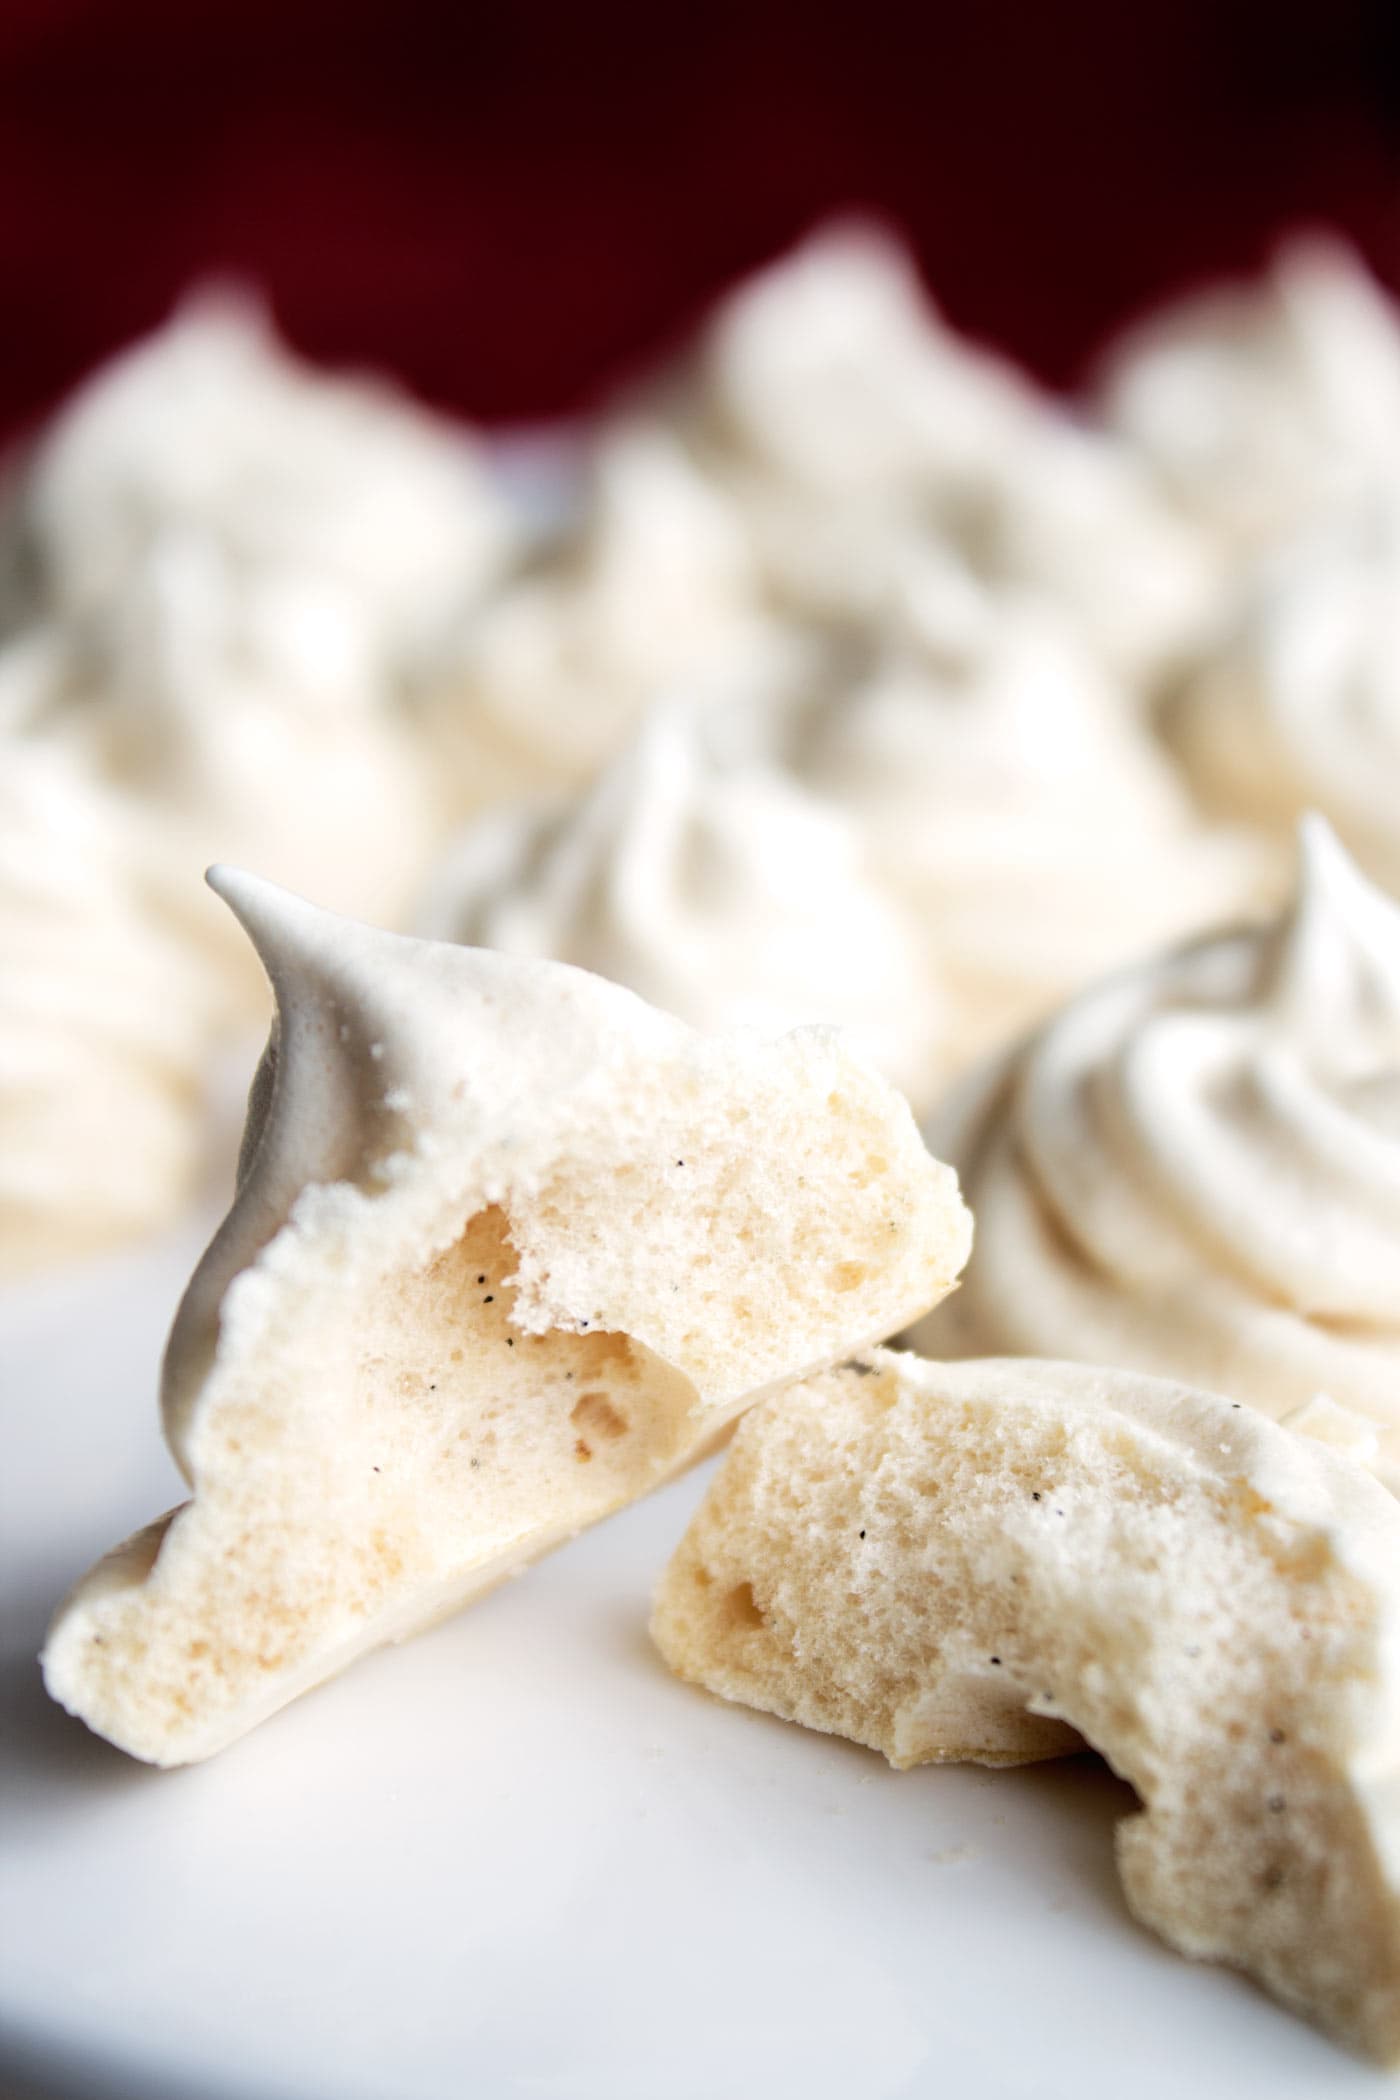
Luckily, my second and final attempt was a winner! I tried the Swiss meringue method. And, hallelujah, it worked! To make a Swiss meringue, you heat the egg whites and sugar (maple syrup here) over a double boiler then beat it in a stand mixer or with a hand mixer until light and fluffy. These Swiss meringue cookies baked up perfectly into little swirly puffy clouds that were full of flavor, airy, and both soft and crisp. Perfection. They are just heavenly.
If you’ve never made meringue before here are some important tips:
- Make sure your bowls, utensils, hands, and baking sheet are all free of any oils. Also, make sure that none of the egg yolk gets into the egg whites. Any fat in the process will ruin the cookies.
- Be patient. Two hours in the oven plus 1 hour of cooling. Then you can take them out. I mean it.
- Meringues like to soak up moisture, so as soon as they are cool and done drying in the oven, put them in an air-tight container for storage. Otherwise you will have a chewy, sticky mess.
- Meringues are very sensitive to humidity, so they may weep a bit if you make them in a humid climate or on a rainy day. Save these for a drier day.
- Make sure to heat the egg white mixture to 140ºF/60ºC. I highly recommend using a candy thermometer here. If you don’t get it hot enough, you may have issues with the cookies weeping in the oven.
- When you are beating the mixture in your stand mixer or with a hand mixer, make sure you beat it long enough. Again, if you don’t you may have issues with weeping cookies. Don’t make them cry! They didn’t do anything to deserve it! You want to beat the meringue until it is super fluffy, shiny, holds stiff peaks, and has cooled completely. Somewhere between 8 and 11 minutes should be just right.
- These little cookies are completely addictive, so you may want to make a double batch 😉
Join My Community!
Want to get my new recipes delivered straight to your inbox?
Sign up for my weekly newsletter and never miss a new recipe!
Maple Vanilla Bean Meringue Cookies
- Gluten-Free
- Dairy-Free
- Paleo
- Low Calorie
- Vegetarian or Vegan
- Pescatarian
Ingredients
- 2 egg whites 66g, room temperature
- 1/8 tsp cream of tartar
- Pinch of sea salt
- 1/2 cup maple syrup 118mL
- 1 vanilla bean scraped
Instructions
- Preheat oven to 200ºF (90ºC). Line baking sheet with parchment paper.
- Create a double boiler by bringing about an inch of water to a simmer in a medium saucepan.
- In a medium-sized glass or metal mixing bowl that fits over the saucepan without touching the water, whisk together all ingredients.
- Place the bowl on top of the saucepan. While continuously whisking, bring the egg white mixture to 140ºF (60ºC). If you do not have a candy thermometer, heat the mixture for about 3-5 minutes until it is very warm (use of a candy thermometer is highly recommended though - see note above).
- Remove the bowl from the heat and beat the egg white mixture in the bowl of a stand mixer with a whisk attachment. Begin on a low speed and then gradually increase to high. Beat the mixture for about 8 minutes or until the meringue is cool, looks shiny and pearlescent white, and forms stiff peaks.
- Use a very clean silicon spatula or soup spoon to spoon the meringue into a pastry bag fitted with the piping tip of your choice. I use a wide star tip.
- Pipe the meringue into little cookies (about the diameter of a golf ball or smaller) on the parchment paper. They don't really spread much when baking so you don't need too much room between the cookies. Alternately, you can just spoon the meringue onto the parchment paper in little dollops for a freeform, rustic look.
- Bake on the center rack for 2 hours, flipping the baking sheet at the halfway point.
- At the end of the 2 hours, turn off the oven, leave the door closed, and allow the cookies to cool in the oven for at least 1 hour. You can tell when they are done because they will easily come off the parchment paper. If they are stuck at all, leave them in the oven a bit longer.
- After the cookies come to room temperature, store them in an air-tight container.
Did you love the recipe? I would love it if you left me a 5-star review below! ![]()
Did you make this recipe?
Tag @itskitskitchen on Instagram and hashtag it #kitskitchen
Did you like the recipe? I’d love to hear your feedback in the comments section!
xx Kit
Disclosure: This post contains affiliate links (Amazon Associate). These links do not cost you anything, but I do receive a commission when you use them. They are a great way to support blogs you love and pick up some good things while doing it!
These turned out amazing I might use less maple syrup next time. But still love them
Easiest meringue cookie recipe I’ve found. Thank you!
Hi, Dani! I’m so glad you love the recipe! Thanks so much for taking the time to leave a review! 🙂
i was wondering what kind of maple syrup you used, since fake maple syrup is much thicker than real maple syrup and i can’t make it with fake maple syrup
For this recipe I use 100% pure maple syrup. Usually grade A from Vermont. Hope this helps!
These turned out great! I took the ingredients x 3, blended them together and put in a mason jar in a sous vide bath before I whipped them. I used about half the maple syrup it called for and it was still plenty sweet. Thanks for the recipe!
So glad you liked the recipe! Wow, I love the method you used! I’ll have to try that! And good to know it still worked with half the maple syrup too! You’re very welcome 🙂
THANK YOU SO MUCH SHARING THIS RECIPE!!! I have been buying meringues 4 to bag $2.50 each, then increased my order each week for months. Like 45 bags a week! The last 4 weeks I’ve been buying in bulk to the tune of $36.00 a bag. I just made a batch from your recipe and NAILED IT!!!!! My cost $20.00! I even bought the carton of egg whites to use. I’m doing the happy dance in my kitchen right now!!!
Hi, Debbie! Aww yay!!! So happy to hear that! Thanks so much for taking the time to comment and leave a review 🙂
Hi Kit, Could you please tell me how many grams or milliliters is half a cup? I am from Europe and maybe we have different size of cup 🙂 Thank you.
Hi Lenka! Half a cup (US) is 118mL. I will add that to the recipe! 🤗
I would love to try these with sugar-free syrup like Torani. That’s sweetened with Splenda. Any guess if this might work?
Hi Marcia! I’m not sure if it would work or not, I’m sorry! I really like the Lakanto maple flavored monk fruit sweetener because it has a similar taste to maple syrup. Still with that one I’m not sure if it would work because the viscosity is a bit thinner. Meringues are very notoriously sensitive to extra moisture and require precise measurements. If you try it I would love to hear how they turn out!
They are so good. I made these and they turned out pefect. I just had to say thank you for the recipe. Me and my son are big fans of these.
Hi, Cat! Aww that’s so good to hear! I’m so glad y’all enjoyed the recipe so much. You are very welcome! 🙂
Is it really 1/2 cup of maple syrup for only 2 egg whites?! Isn’t it too much?
Hi, Nomi! Yes, that is correct 1/2 cup maple syrup to 2 egg whites from large eggs (66 grams).
My five year old daughter and I made these this afternoon. They’re delicious! I used vanilla extract instead because that’s all I had. They still came out great. Thanks for the recipe!
Hi, Samantha! You’re very welcome. So happy y’all enjoyed the recipe! And good to know that it also worked with vanilla extract!
I made these using 1 tbsp of vanilla bean paste instead of the actual vanilla bean and also without cream of tartar because I didn’t have it on hand. They came out excellent! You get great maple flavor from these meringues and they are so light and wonderful!
Hi, Elizabeth! So glad to hear the recipe came out well even with the substitutions! That’s awesome! Thanks for sharing and so happy you enjoyed the recipe 😊
Looks wonderful! I can’t wait to try this. Have you ever used fresh eggs? I was wondering if that changed the consistency? I used fresh eggs in my lemon bars and it didn’t look the same. Thoughts???
Hi, Caroline! Thank you!! The eggs I use are pretty fresh (I buy them unrefrigerated here in the Netherlands), so I don’t think the freshness of the eggs should cause an issue!
Can I use vanilla extract instead of bean?
Hi, Jen! You could try it, but I would not recommend it! Meringues are very sensitive to changes in the recipe, especially when it comes to the proportion of wet vs. dry. Plus, since there aren’t any other flavorings in these meringues besides maple syrup and vanilla, you really need the vanilla bean itself to give you that rich vanilla flavor. Hope this helps!
Can u substitute honey for the maple syrup?
Hi, Deb! You could try it, but I really wouldn’t recommend it. Meringues are really sensitive to small changes in ingredients, so you could end up with a big sticky mess when you bake them.